|
|
Post by lordnth on Oct 22, 2012 19:18:09 GMT -5
So I was finally able to get to a monthly miniatures gaming group meeting. This one was at POP! in Utica. The Miniature Art Of War guys were in full blast playing all sorts of games. I was doing Gruntz all afternoon. The first one feature me vs Orge44 in a straight up 150 fight. My force- 2 Gruntz squads (w/ SA autocannons and missiles), Commander, Medic, tracked Medium tank and scout sized transport. 150 pts. even. His force- 4 Gruntz squads (one featuring SA of 2 sniper rifles, another featured 2 flamers), Commander, Specialist Motar Squad, Heavy Mecha. 148 or 149 pts. Built in board features lead us to House Rules of any hill featuring two or more level changes Meant the unit was moving though rough terrain. Seeing so many forces on his side of the table I quickly got nervous. I had no blast radius weapons save for the bad missile shot in the APC. This was going to get rough. His lower stats to fit more into his army was his undoing. That meant his Mecha couldn't fit with long range attacks. Knowing that and not wanting to tangle the Mecha and have 2 of his squads surround me I cut across the board to face one of his squads while it was greatly out numbered. (his squad on the side vs my mdeium tank and another squad) A Gruntz squad come in front of the Mecha. Combined fire, and hits with the autocannon and missile the Mecha's full attention. Just then my Commander came up over a large hill and do more damage to the Mecha. Breaking though his lines my tank and APC target his commander. He flees only to come into range of my commander just after his Mecha falls. Medic was worth it's weight many times over, he would heal troopers waxxed countless times over again. Ist turn I don't like the field of vision with a large Mecha towering just off of range. 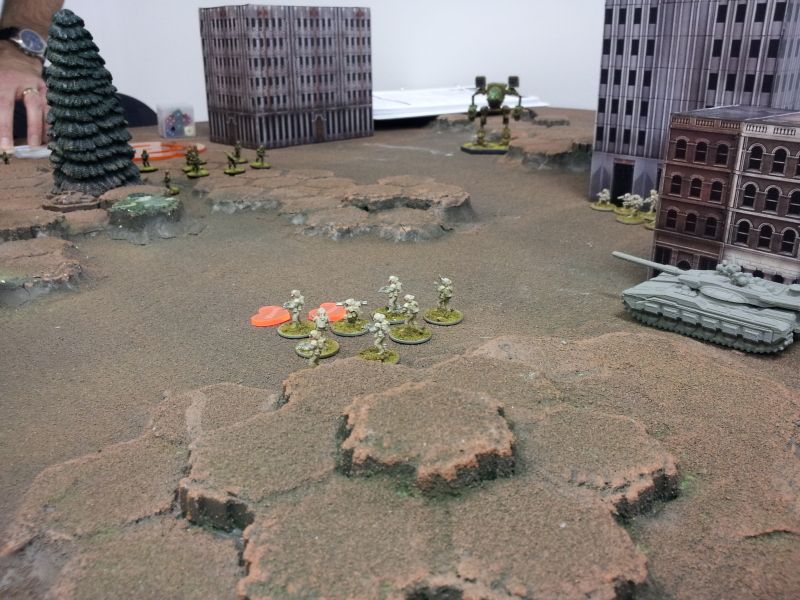 2nd turn APC deploys Medic. Medic heals, while squad two knowingly faces off with the Mecha. Commander sneaks on the other side of those buildings for a flanking shot onto the Mecha.  Once i break those Gruntz the army can run behind his lines and target their commander.  Shorty after that the Commander dies and 90% of his units fail condition brown check. Next game I loose badly and in much less time. |
|
|
|
Post by Mr. Harold on Oct 22, 2012 20:33:20 GMT -5
Great AAR! Thanks for posting it...Do you guys use the cinematic commander rules?
|
|
|
|
Post by twogunsblazing on Oct 22, 2012 22:33:19 GMT -5
Sounds like you guys had a great couple of games at 1 win each. Nice looking board and mini's too. Thanks for sharing mate!!!
|
|
|
|
Post by inrepose on Oct 23, 2012 4:54:37 GMT -5
Thanks for sharing the details, really great to see that Madcat model in action! I don't always use mine because I can't associate Battletech models with the Gruntz game, so for most videos I use alternative models.
|
|
Alleycat
Recruit
 Only the dead have seen the end of war - Plato
Posts: 2
|
Post by Alleycat on Oct 24, 2012 21:31:59 GMT -5
I was able to take on LordNth for the second and third games of the day at POP! after watching the first match between LordNth and Ogre44.
Game #2: 200 points each. Goal: Destroy enemy force.
My Force: 200 points
(2) Squads Ashanti Republic Marines - No Attachments. (13 pts. ea.)
(1) Ashanti Republic Marines Lieutenant (16 pts.)
(2) Ashanti Republic Marines Bobcat Grav Drone (10 pts. ea.)
(2) Ashanti Republic Marines Spartan 1A1 Assault Tank (69 pts. ea.)
LordNth's Force: 200 points
(3) Squads Earth Force Reaction Marines - (2) Attachments. (19 pts. ea.)
(1) Capt. "Big" Joe Bones (22 pts.)
(1) Earth Force Reaction Marines Medic (10 pts.)
(2) E.F.R.M. Bulldog Power Armor (16 pts. ea.)
(1) E.F.R.M. Portable Laser Team (12 pts.)
(1) Sabre Heavy Tank (67 pts.)
We used the same basic setup as Game #1. I setup my force to begin a pincer movement on Turn 1. LordNth setup his forces with the Sabre and (2) Infantry Squads countering the left flank pincer and his Commander, the Bulldog Power Armors and the rest of his units countering the right flank pincer.
Turn #1:
I lose initiative and LordNth makes me go first. (This became a theme with my initiative rolls all day!) The Spartans led the way with the Bobcat Drones in close formation. My infantry lays back waiting to see LordNth's assault. My Spartan exchanges fire with his Sabre with his tank getting the worst of it. My other Spartan takes a long range shot with its missile system at his Medic and the surrounding force. "After the mushroom cloud clears" to quote LordNth, the Medic, both Bulldogs and one Squad are gone with his Commander seriously wounded. He goes to ground with the Laser Team.
Turn #2:
I win initiative and move my Bobcat Drones to mark the Sabre for the Spartans. My Spartan on the left flank moves to cover and hits the Sabre with its missile system. The shot misses and drifts on top of LordNth's two remaining infantry squads hiding behind the building near to the Sabre. When the dust clears, all but one squad attachment with its missile launcher is gone. My Spartan on the right flank fires its main gun at the Sabre and succeeds where its partner failed. LordNth's Sabre destroys one of the Bobcat Drones as his squad attachment takes cover in a nearby building.
Turn #3:
I lose initiative. LordNth's squad attachment in the building takes out the other Bobcat Drone as it tries to move to mark the Sabre for my Spartans. My Spartan on the left flank fires his missile system at the Sabre and misses. His Sabre goes to cover behind the building that the squad attachment is in. The Spartan on the right flank levels the building with the squad attachment in it after the Bobcat Drone is destroyed. LordNth's squad attachment is destroyed in the collapse.
Turn #4:
The Spartan on the left flank moves from cover and direct fires on the Sabre with its main gun, killing the Sabre. At this point LordNth conceded the field.
Game #3: 150 points each. Goal: Destroy enemy force.
My Force: 150 points
(2) Squads Ashanti Republic Marines - No Attachments. (13 pts. ea.)
(1) Ashanti Republic Marines Lieutenant (20 pts.)
(2) Ashanti Republic Marines Bobcat Grav Drone (10 pts. ea.)
(1) Ashanti Republic Marines Spartan 1A1 Assault Tank (69 pts. ea.)
(1) Ashanti Republic Marines Razorback ATV Medic (15 pts.)
LordNth's Force: 150 points
(2) Squads Earth Force Reaction Marines - (2) Attachments. (19 pts. ea.)
(1) Capt. "Big" Joe Bones (22 pts.)
(1) Earth Force Reaction Marines Medic (10 pts.)
(1) E.F.R.M. MP Stoat R (29 pts.)
(1) Merka 5T Medium Tank (51 pts.)
We reset the terrain of the board to have most of the buildings in the center with some woods on the right side of the board for each player.
I led with my infantry in this game with the Spartan moving to a covered firing position behind a building on Turn #1. LordNth moved his infantry up the board with his Merka 5T in support. His Medic was in the Stoat R for a rapid deployment. After I marked his Commander for a missile shot from the Spartan, he deployed his Medic to care for him.
Our infantry traded blow for blow with a lot of misses or hits with no damage. I was able to take out one of his infantry squads with a Spartan missile shot after one Bobcat Drone marked them. His Stoat R tried to make a run forward on the right flank and was blasted by another Spartan missile shot. LordNth's other infantry squad was able to destroy a Bobcat Drone.
LordNth's Merka 5T concentrated on my infantry and ignored my Spartan all game. I began to realize his strategy was to close with my Spartan Assault Tank and take away its ability to use its missile system, either by being inside its minimum range or by being too close to my own units. Once his Merka 5T is in line of sight with my Spartan, it uses its main gun to heavily damage the Merka. I follow with a missile shot on the Merka's supporting infantry squad, and when it misses and deviates slightly, it kills not only the entire infantry squad, it finishes off the Merka 5T as well.
I send my ATV Medic forward to attack his Medic, and he is quickly killed by his remaining Medic and Commander. After that, my infantry and the Spartan finished off LordNth's Force.
I ended up losing (3) Marines from my two squads, (1) Bobcat Drone and my Razorback ATV Medic.
I have to agree with LordNth in that a Medic is so worth the points, helping to heal troops that would otherwise be lost. The added benefit of very high mobility (9") make it able to cover a large part of the battlefield.
The other part of my units that was a major force multiplier was the Bobcat Drones. With them spotting for my Spartans, I am only risking a 10 pt. Specialist, while allowing my tanks to fire from the safety of cover. LordNth knows this though, and it has turned them into a "Bullet Magnet."
All in all, a fun afternoon / evening at POP! and I enjoyed meeting some of the members of the Mini Art Of War Group. Thanks to LordNth for some tough matches, and three more kill rings for my Spartan 1A1s!!
|
|
|
|
Post by lordnth on Oct 25, 2012 4:39:33 GMT -5
Wish took pictures of the third game. While the A. Tank was still a pain it wasn't such a factor. While both games vs. Alleycat were loses they all were fun.
Thanks for posting the details of game 2 and 3.
|
|
|
|
Post by lordnth on Oct 25, 2012 4:40:17 GMT -5
Great AAR! Thanks for posting it...Do you guys use the cinematic commander rules? We did not use any of the optional rules at this time. |
|


