|
|
Post by golan2072 on Nov 26, 2011 5:58:32 GMT -5
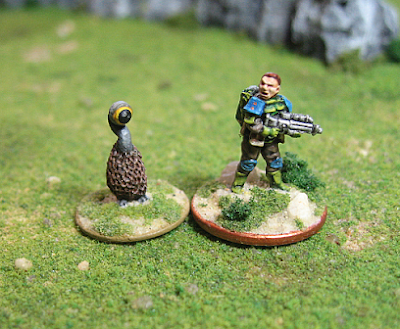
Usually coins as bases with cat litter as rocky dressing.
|
|
|
|
Post by zombie4prophet on Nov 26, 2011 11:26:52 GMT -5
I am also one of those using Liquitex "Black Lava" texturing gel.
My process is to:
1) Gorilla Glue mini to ferrous Canadian Penny;
2) Let dry 4 hours (usually overnight, but 4 will do);
3) Wash based minis in warm soapy water;
4) Rinse based minis in filtered water;
5) Let dry;
6) Put on the Gel with a tooth pick or dental probe;
7) Dip in sand/pebble mixture;
8) Let dry overnight;
9) Drop based mini 3-4 inches to table to knock loose any sand pebbles, also blow on mini to remove loose detritus;
10) Prime base only with brush-thinned Artist's Gesso (primarily Black);
11) Repeat Step Five;
12) Prime mini with brush-thinned Artist's Gesso;
13) Paint base, but leave off any static grass or clump foliage until after finishing and sealing mini.
I will sometimes try to rush the steps by not allowing enough drying time, leaving out the washing, or priming the entire base/mini all at once, I always regret it. The Gesso won't stick properly without the mini being thoroughly clean, lack of drying time can cause "pinching" and basing material always ends up in the cracks or on limbs.
For this reason, I always batch prime and make an evening of it, it's often boring, time consuming and mindless, but getting this part right makes for far less problems later with flaking, chipping or rubbed off paint on the mini or the base.
|
|
shep
Recruit

Posts: 14
|
Post by shep on Dec 27, 2011 2:51:40 GMT -5
I'll eventually post some pictures to back this up, but I keep it simple and it works nicely:
Gel superglue to 5p piece (grind the knurls off) - epoxy would be better though more hassle
PVA glue all over
Dip in sand - if you use 'sharp' builders sand the texture is more varied and you get the odd 'boulder' sized rock.
Then the colour scheme varies. I'm currently doing desert so:
Desert yellow base
Bleached bone drybrush
Bigger rocks picked out in dark grey
Fortress grey drybrush
Whole model varnished at this stage
Dead grass patchy flock
|
|
|
|
Post by inrepose on Dec 27, 2011 15:15:55 GMT -5
Note to zombie land. A tip for using sand is to wash it after it first dries with 1 part white glue (wood glue) to 3 or 4 parts water. Basically a thinned down watery glue wash. It seals the sand, making it take paint more easily and you get no sand crumbling off because it dries as hard as concrete.
|
|
|
|
Post by fjodin on Dec 29, 2011 16:56:34 GMT -5
15mmworld.blogspot.com/2011/10/basing-tutorial.html Basing tutorial. I'll use Irregular Miniatures 15mm Ashanti figure Glue your painted figure to base (I use 20mm washers)  Then you need sand with different sized grains. 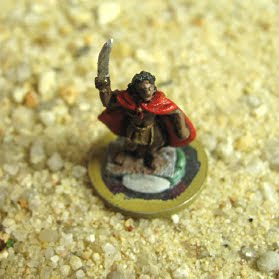 Close shot of sand. 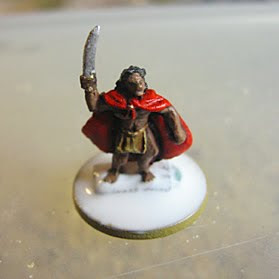 Cover base with PVA glue. 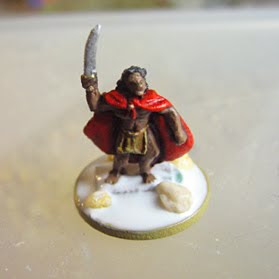 Place big sand grains first. 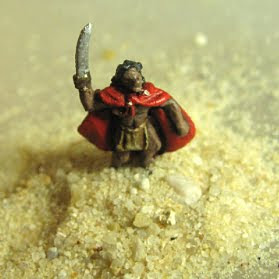 Then cover base with small sized sand grains. 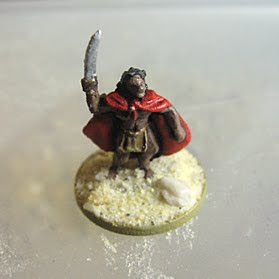 Wait 1 or 2 hours and remove remove the base from sand pile.  Place small amount of PVA where you want to add grass. 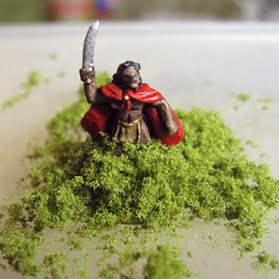 Cover base with flock. For this tutorial I used Woodland Scenics Light Green Coarse Turf (T-62)  After 1 or 2 hours remove mini from flock pile. Now you have one more recruit in your army 
|
|
|
|
Post by fjodin on Dec 29, 2011 17:01:06 GMT -5
|
|