|
|
Post by pakwagon on Jan 29, 2013 2:31:52 GMT -5
Thought I'd share a couple of images of some Drones I knocked up today. This is a pretty basic build. The top part is a button with the bottom bit that takes thread cut off. The body is a plastic gun from a friends bits box, with the barrel removed (any lump of plastic would pretty much suffice, as you can't see much of it in the end). Space Marine players will notice the head is taken from a Hunter Killer missile launcher. The guns were scratch-built using plasticard and aluminum tube (a similar build to the one I used for my APCs - see tutorials). Anyway, hope you like. 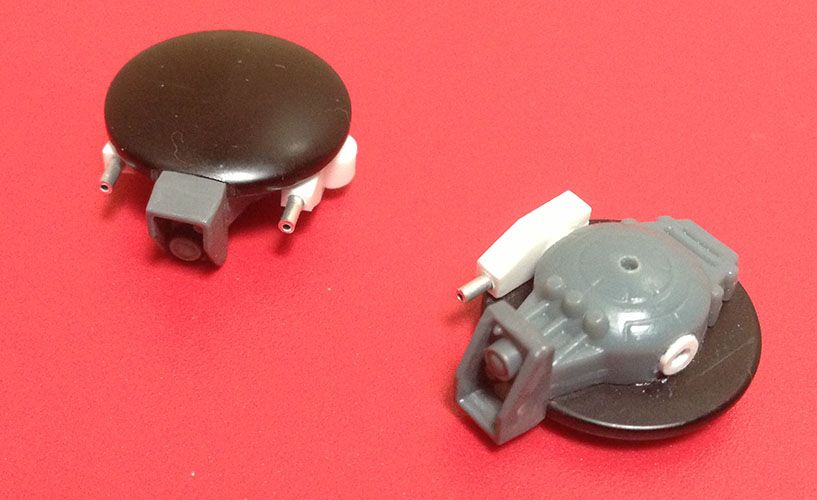 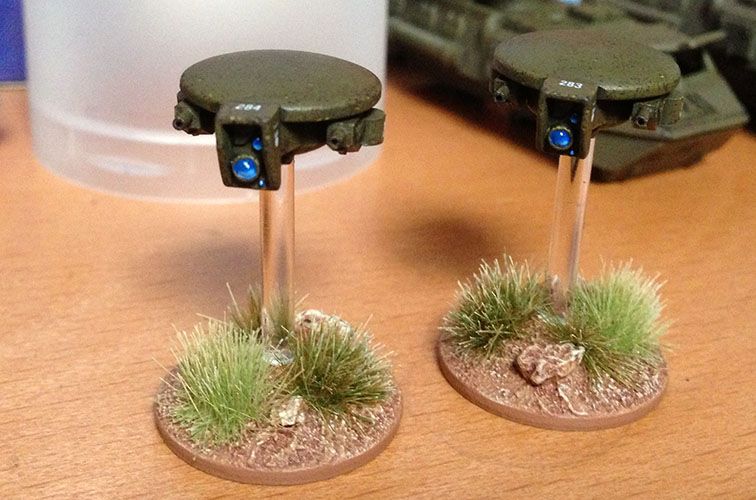 and a scale ref. 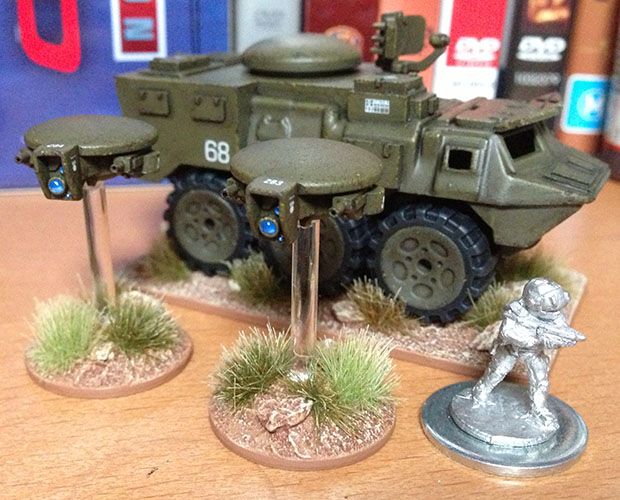 |
|
|
|
Post by comstar on Jan 29, 2013 8:19:21 GMT -5
I really like them  Good inspirational piece with them bottons |
|
|
|
Post by Mr. Harold on Jan 29, 2013 9:03:32 GMT -5
Very nice... really slick paintjob too.
|
|
quozl
Sub General

Posts: 165
|
Post by quozl on Jan 29, 2013 12:02:32 GMT -5
yep, those are excellent.
|
|
|
|
Post by timvidlak on Jan 29, 2013 14:16:32 GMT -5
Really nice work thanks for sharing the drones.
|
|
|
|
Post by pakwagon on Jan 29, 2013 16:22:28 GMT -5
Cheers.
Thought I'd go for a beaten up look.
Piicked up cheap at some military clearance sale - perfect for a bunch of down-and-out mercs.
Just need to paint some damn infantry now.
|
|
|
|
Post by inrepose on Jan 30, 2013 9:01:33 GMT -5
Stunning, you have that battered military green look down to perfect.
|
|
|
|
Post by inrepose on Jan 31, 2013 3:46:33 GMT -5
Please can you share how you achieve the mottled weathered look. Is there a link? Thanks.
|
|
|
|
Post by pakwagon on Jan 31, 2013 6:29:58 GMT -5
Just finished pimping my two rides and must admit to having a love/hate relationship with the Army Painter Tufts. At least that's my vehicles and drones done. Now I have to paint up my commander, sniper and 2 squads of Gruntz to give me 200pts. 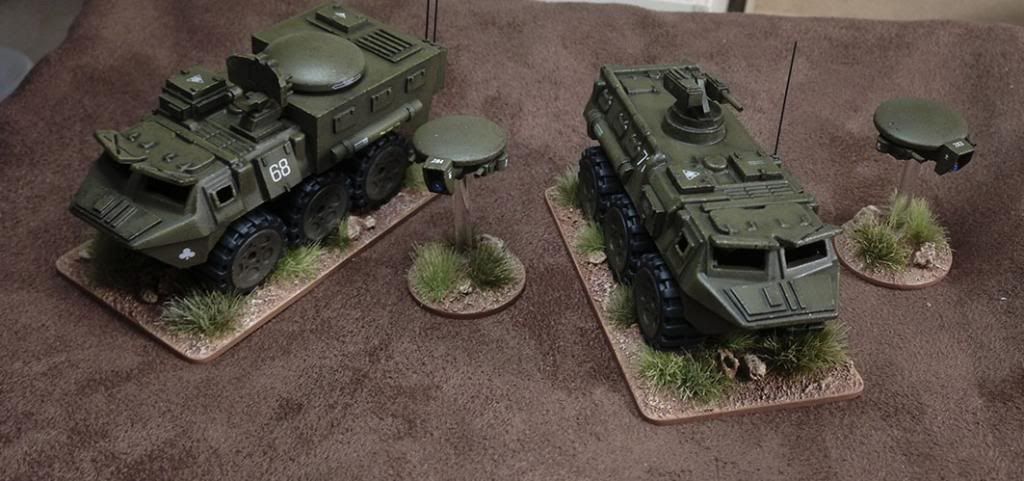 Must stop taking shoddy photos with my iphone late at night ...and then writing a tutorial  Please can you share how you achieve the mottled weathered look. Is there a link? Thanks. Not sure where I found the original technique from, although I seem to remember it being used on a 15mm Sherman. Anyway, here is how I do it: 1. Vallejo Brown Violet base coat. 2. Add increasing amounts of Vallejo Dark Yellow for dry brushing. Don't be afraid to go almost to straight dark yellow, Light edges on the model will show up the chips better. 3. Vallejo German Camo Dark Brown sponged on as chips. - Get a piece of tin foil and smear on a little of the dark brown.
- Tear off a piece of blister pack foam and dab at the paint.
- Now sponge a few times on to a piece of paper towel to remove some of the paint.
- LIGHTLY press the sponge on to areas of the model that would have wear. This is the tricky part and only practice will give you some idea as to how much paint should still be on the sponge. For those hard to reach areas use a tiny piece of foam held by tweezers. Don't go overboard with your sponge, less REALLY is more!
4. Once you're happy with the chips, wash the whole vehicle with Paines Grey and Burnt Sienna oils, diluted heavily with White Spirit. Once this is dry, use mix in more Paines Grey and wash around hatches etc. Note: I like the subtle stain and shading the wash gives but if you want to see more of the actual paint, moisten a cotton bud with white spirit and rub off the paint from raised areas and flat panels. Try to do this relatively quickly and don't spend too much time in one spot or you may run the risk of damaging the paint. I tend to go through about 4 cotton buds per vehicle. Once you're happy with the result, spend the next 10 mins picking off all the bits of cotton bud that's now stuck to the figure On the upside it doesn't permanently stick and will come off really easy. This technique comes up a treat but you will end up loosing some of the wash from the recesses. The darker wash applied again to those recesses should alleviate some of the problem 5. Carefully paint dots under some of the dark brown paint chips with Dark Yellow to give the illusion of depth. You can also paint sporadic dots along the edges of panels using the side of your brush. Again, don't go overboard a) it will look naff and b) it will take bloody ages to finish this step and you'll likely get bored half way through. 6. Apply gloss varnish to areas you want to place decals, then after applying the decal, add another layer of gloss over the top of the decal. This will remove that crappy frosting you often get around you decals. 7. Testor's Dullcote. Here's a couple of gnarly closeups that hopefully show the chips. 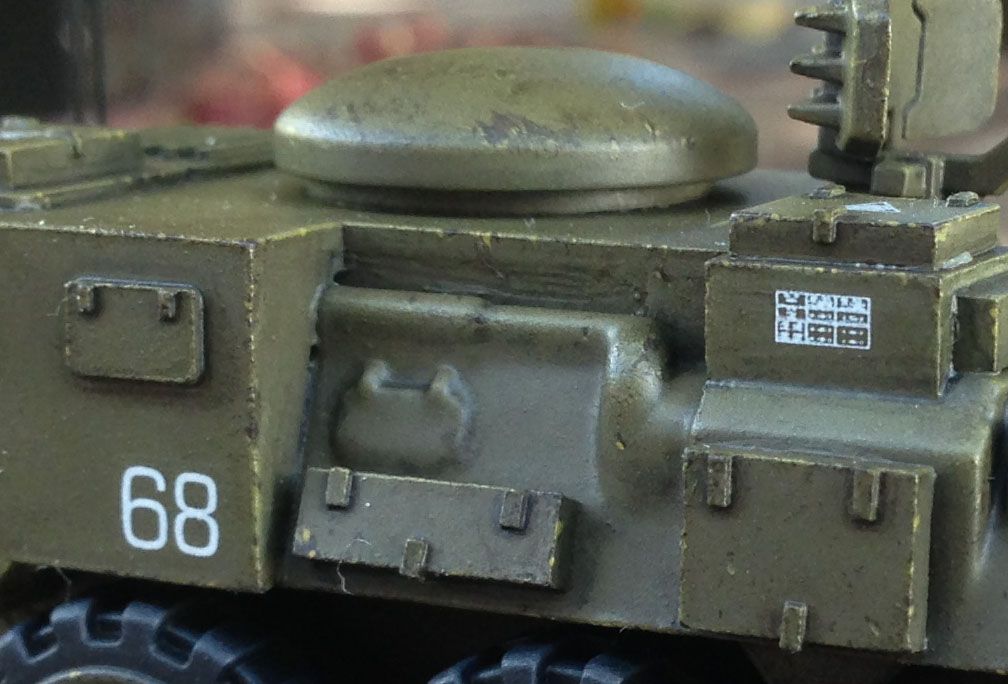 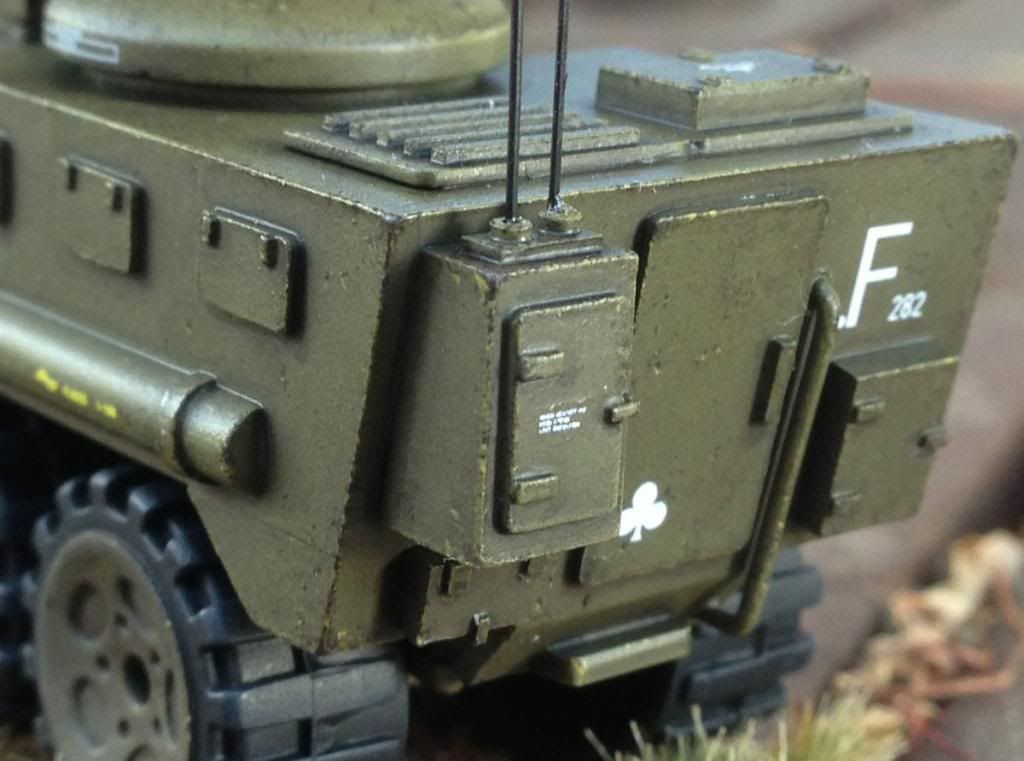 Hope this long winded explanation helps. |
|
|
|
Post by timvidlak on Jan 31, 2013 7:34:24 GMT -5
Really Nice Vehicle I Still Love the Drones & Thank you for the Tutorial on the weathering technique. I'll have to try it when I get Time.
|
|
|
|
Post by pakwagon on Jan 31, 2013 8:00:21 GMT -5
Thanks. I must confess to loving the drones more than than the vehicles. Can't help but wonder if a shield drone would look cool or perhaps a larger one with a heavier gun - just need to find a bigger button |
|
|
|
Post by tokoloshe on Jan 31, 2013 9:20:57 GMT -5
Love those drones. You sure know how to use buttons! Between your drones and your gun mounts, I'm going to be headed to a fabric store soon.
|
|
|
|
Post by Mr. Harold on Jan 31, 2013 9:21:55 GMT -5
Thank you for the technique... I'll have to try it out, since your vehicles look amazing!
|
|
|
|
Post by inrepose on Feb 1, 2013 6:54:18 GMT -5
Aha! It is the rare and most secret sponging technique! It works really well, thanks for that. No I am off for a sponge bath! |
|
|
|
Post by pakwagon on Feb 1, 2013 16:34:37 GMT -5
Certainly is Another option, if you don't like the total randomness of using a sponge, is to apply the chips directly with a brush. Use a lighter shade of your base colour (you'll want it slightly lighter than your brightest highlights). Basically use the side of your brush to do little "morse code" style dashes along all the edges of the figure - again, less is more. Once you've completed this step, apply another dash of a really dark shade inside most of these light chips. This will give the illusion of deeper chips. I think this technique looks a lot neater than the sponge but it's a little harder to chip flat panels, as you have to stop and think about where you want those chips and scratches - something I always have trouble with. Anyway, here's an example. 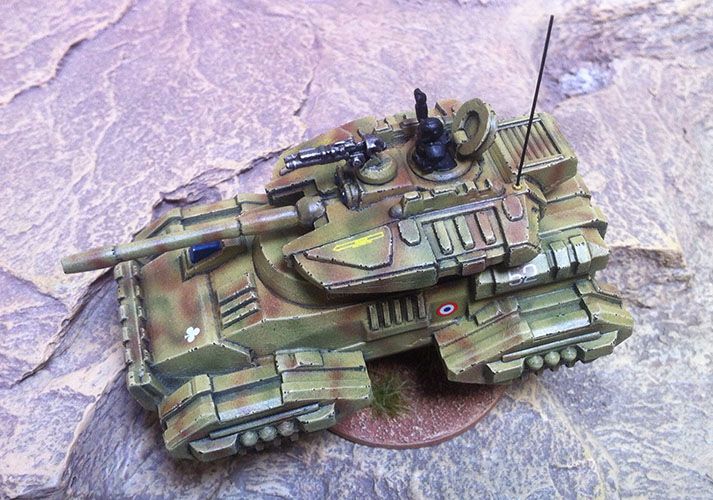 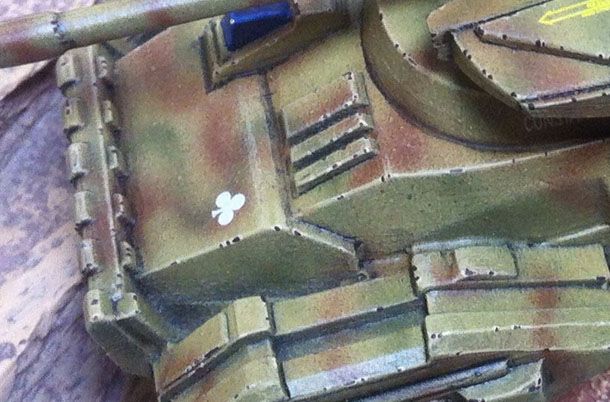 |
|


 Good inspirational piece with them bottons


