

Post by pakwagon on Jan 6, 2013 23:26:30 GMT -5
Thought I'd finally get around to writing up a tutorial on how I build my turrets for my APCs.
Apologies for the poor quality photos - the original ones were even worse.
I ended up having to building another turret just for the tutorial.
Things to note:
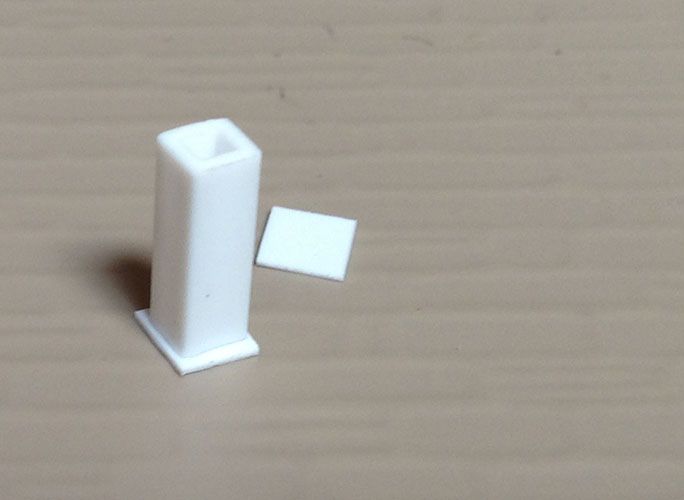
Weapon Mount

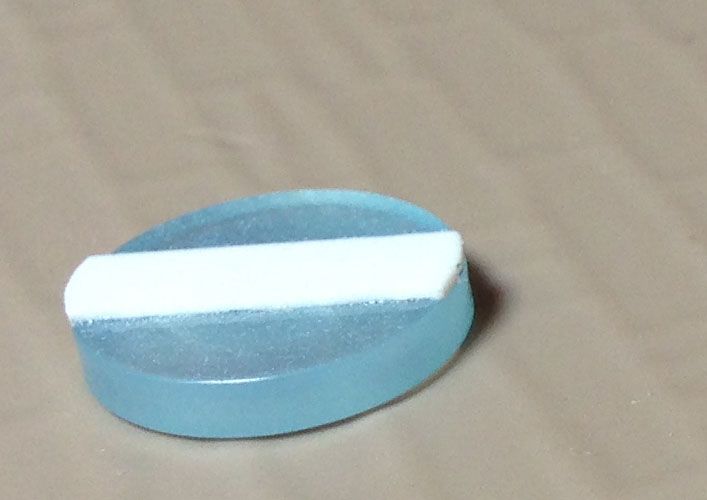
First thing to do is superglue a strip of plasticard, A, across the holes in the Button.
This not only covers up the holes but adds a little to the overall look.
Once the glue has dried turn the button over and trim the plasticard so its flush with the edges of the button.
Sand to smooth.
Insert the Rod into the holes drilled into B. Just play around with the fit so they are horizontally level.
Next glue the thin pieces of plastic tube C1/C2 onto the Rod.
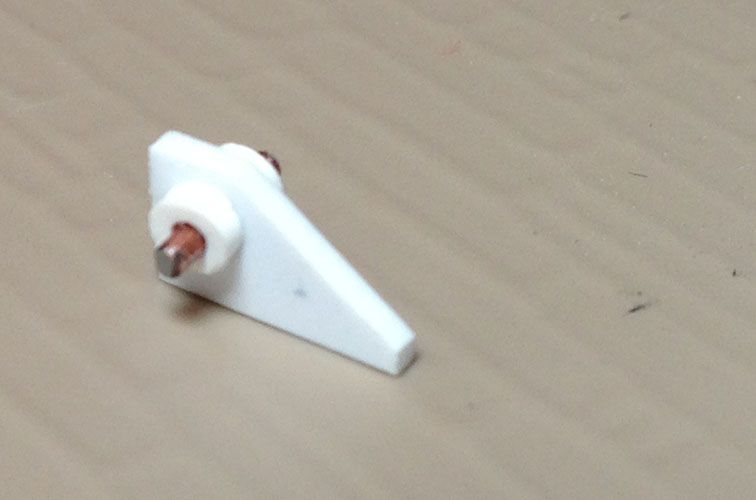
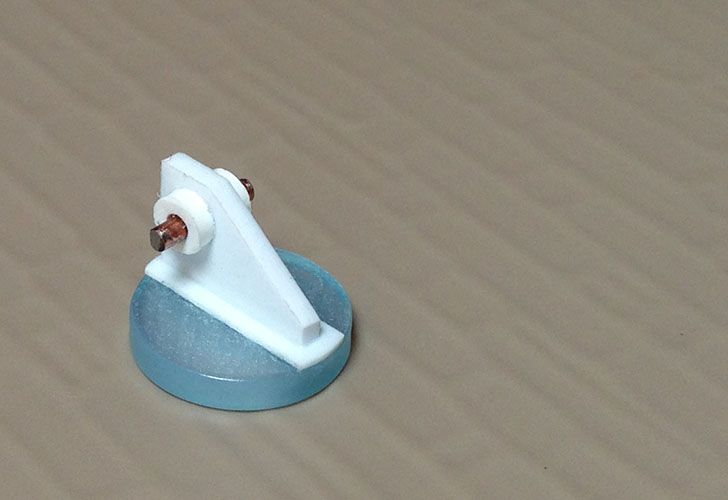
Finally glue this assembly onto the Button.
Spend some time here making sure the whole assembly is level, otherwise your weapons will look lopsided.
Missile Launcher
Unfortunately these photos are probably the fuzziest but for clearer pics check out the finished product at the end of the tutorial.
Most of you will also wonder why the hell I increased my workload by using a square tube rather than square rod.
In truth I couldn't find my square rod but the plastic sheets glued to the end of the tube do create a SLIGHTLY nicer finish.
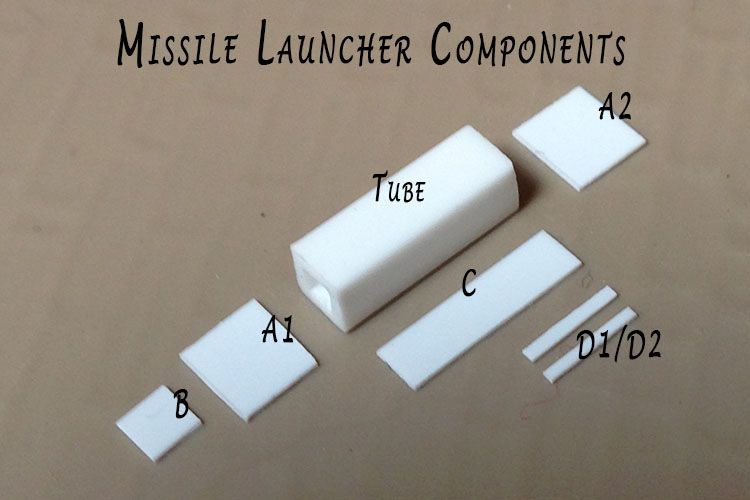
Start with superglueing A1 to the end of the Tube.
It's much easier to make these panels bigger than needed, then trim and sand flush.
I tend to use superglue here rather than plastic cement to speed up the process.
Once you've completely finished the first end, repeat with the other.
Now you should have a nicely finished plastic rod
With the basic launch tube complete - yes you could save 20mins by just using a solid square rod - you can glue B to the end of your launcher and C to the top.
I find the easiest way to do this is to dab a little plastic cement to the launcher then gently rest the tip of your knife on the panel to be glued and apply it to the launcher.
Once you've got the bit in the right position dab more glue around the join and let capillary action do the rest.
Finally add the thin strips of card , D1/D2, to the top rear of the launch tube.
Machine Gun
The barrel is a piece of thin aluminum rod cut to length by rolling the knife along the rod.
This should ensure the cut is even and doesn't buckle the rod.
The Body of the gun is just a length of plasticard with the corner cut from one end and a hole drilled to take the Barrel.
Pretty obvious step this
Just make sure it's level!

Next add A and B to the top of the Body.
They should sit slightly recessed from the edge - as shown.
Do the same with C on the rear of the![]() .
.
Before adding the magazine to the gun, it's probably easier to drill the hole in the Body of the gun now.
To ensure everything was lined up properly, I cut another piece of plastic tube (as from the weapon mount components) to act as a guide for where to drill.
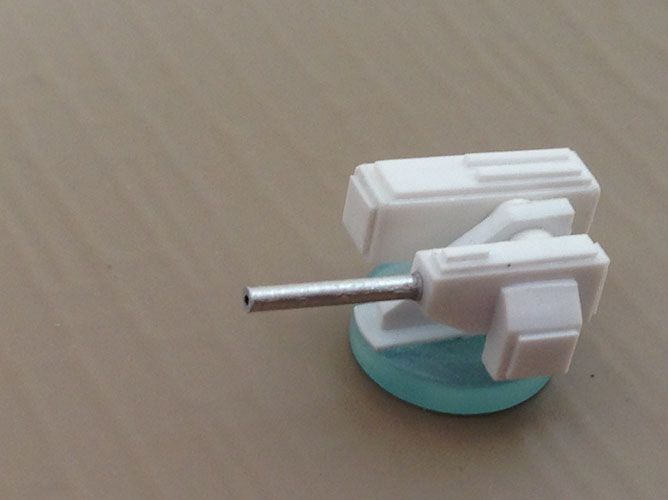
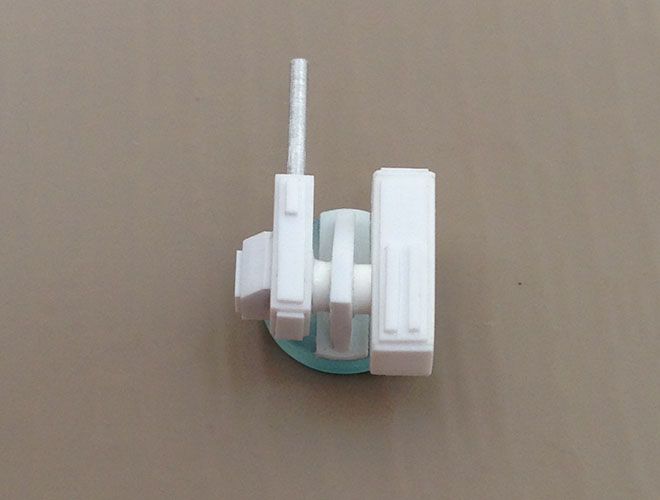
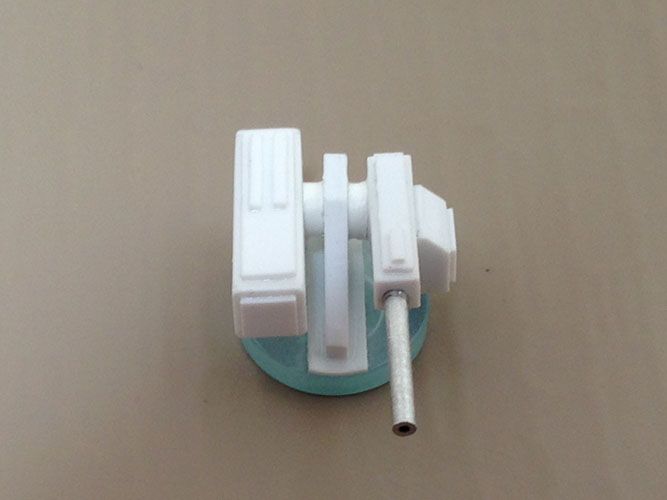
Mounting the weapons
Now you can superglue the machine gun to the gun mount.
Again make sure everything's square but tilt the gun up a little.
This will ensure that when you glue the whole mount to your vehicle there's no risk of the gun pointing slightly down due to the vehicle not being level.
This sounds a little anal but hey, you've gone this far!
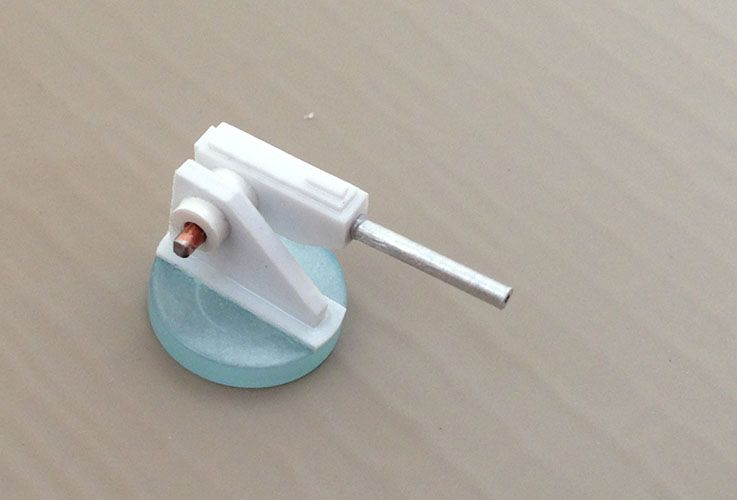
Drill a hole in the missile launcher (again using a small piece of the plastic tube as a guide if necessary) and attach to the gun mount.
Now the guns assembled you can glue D to the Magazine and then glue this to the side of the machine gun.
The Magazine being a square piece of plasti-card with a slope cut on one end.
Well, that's about it.
I didn't say it was an easy build (especially now I've built 4) but if you've stayed awake, it should give you some inspiration to have a go making your own.
Cheers,
Pakwagon
Apologies for the poor quality photos - the original ones were even worse.
I ended up having to building another turret just for the tutorial.
Things to note:
- Don't expect any measurements as I tend to guess the sizes I need.
To avoid problems I tend to cut things a little bigger than I think I'll need so after a dry-fit I can trim a little off if necessary. - I use a very thin plastic cement with a brush applicator.
With thin glue you can use capillary action to get the glue where you need it. - Have some wet and dry sand paper handy to smooth surfaces after cutting.
- Where possible, chop with the knife by slowly applying pressure.
If you cut the plastic by drawing the knife along the plasticard with a ruler, you'll create raised edges either side of the cut.
These will need to be sanded which is almost impossible on very small components.
Weapon Mount
First thing to do is superglue a strip of plasticard, A, across the holes in the Button.
This not only covers up the holes but adds a little to the overall look.
Once the glue has dried turn the button over and trim the plasticard so its flush with the edges of the button.
Sand to smooth.
Insert the Rod into the holes drilled into B. Just play around with the fit so they are horizontally level.
Next glue the thin pieces of plastic tube C1/C2 onto the Rod.
Finally glue this assembly onto the Button.
Spend some time here making sure the whole assembly is level, otherwise your weapons will look lopsided.
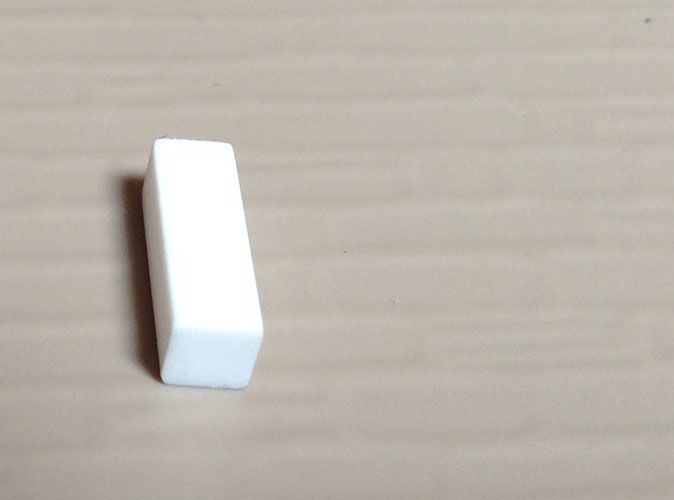
Missile Launcher
Unfortunately these photos are probably the fuzziest but for clearer pics check out the finished product at the end of the tutorial.
Most of you will also wonder why the hell I increased my workload by using a square tube rather than square rod.
In truth I couldn't find my square rod but the plastic sheets glued to the end of the tube do create a SLIGHTLY nicer finish.
Start with superglueing A1 to the end of the Tube.
It's much easier to make these panels bigger than needed, then trim and sand flush.
I tend to use superglue here rather than plastic cement to speed up the process.
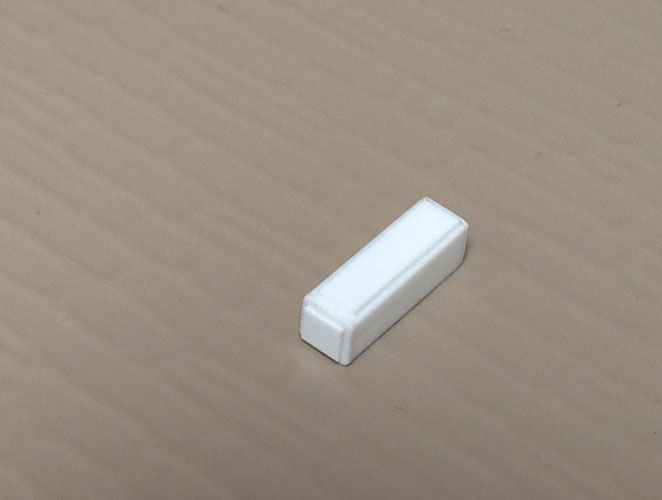
Once you've completely finished the first end, repeat with the other.
Now you should have a nicely finished plastic rod

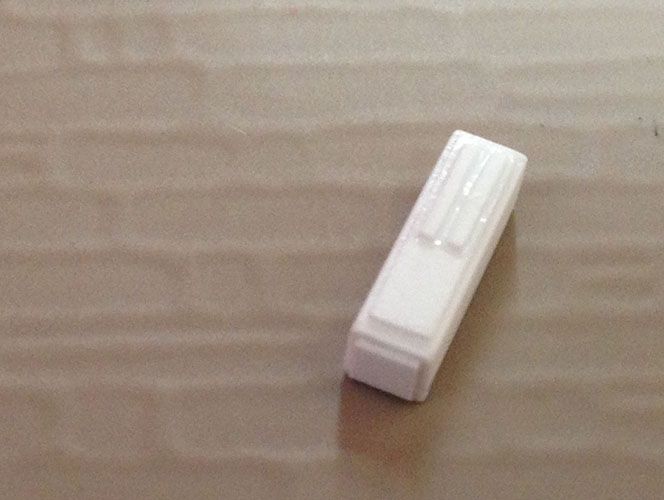
With the basic launch tube complete - yes you could save 20mins by just using a solid square rod - you can glue B to the end of your launcher and C to the top.
I find the easiest way to do this is to dab a little plastic cement to the launcher then gently rest the tip of your knife on the panel to be glued and apply it to the launcher.
Once you've got the bit in the right position dab more glue around the join and let capillary action do the rest.
Finally add the thin strips of card , D1/D2, to the top rear of the launch tube.
Machine Gun
The barrel is a piece of thin aluminum rod cut to length by rolling the knife along the rod.
This should ensure the cut is even and doesn't buckle the rod.
The Body of the gun is just a length of plasticard with the corner cut from one end and a hole drilled to take the Barrel.
Pretty obvious step this
Just make sure it's level!
Next add A and B to the top of the Body.
They should sit slightly recessed from the edge - as shown.
Do the same with C on the rear of the
Before adding the magazine to the gun, it's probably easier to drill the hole in the Body of the gun now.
To ensure everything was lined up properly, I cut another piece of plastic tube (as from the weapon mount components) to act as a guide for where to drill.
Mounting the weapons
Now you can superglue the machine gun to the gun mount.
Again make sure everything's square but tilt the gun up a little.
This will ensure that when you glue the whole mount to your vehicle there's no risk of the gun pointing slightly down due to the vehicle not being level.
This sounds a little anal but hey, you've gone this far!
Drill a hole in the missile launcher (again using a small piece of the plastic tube as a guide if necessary) and attach to the gun mount.
Now the guns assembled you can glue D to the Magazine and then glue this to the side of the machine gun.
The Magazine being a square piece of plasti-card with a slope cut on one end.
Well, that's about it.
I didn't say it was an easy build (especially now I've built 4) but if you've stayed awake, it should give you some inspiration to have a go making your own.
Cheers,
Pakwagon


